As an Amazon Associate, we earn from qualifying purchases. Some links on this site are affiliate links at no extra cost to you. Our recommendations are based on thorough research and editorial judgment.

How To Properly Launch From A Rocky Shore?
To safely launch from a rocky shore, we’ll want to first secure essential gear like a Coast Guard-approved Type III PFD and slip-resistant water shoes. Position your kayak parallel to the shoreline in a natural cove or inlet that offers protection from waves. Use your paddle across the back of the cockpit as an outrigger for stability while entering. Time your launch with incoming surges, and smoothly slide into the seat while maintaining three points of contact. These fundamentals will set you up for mastering more advanced rocky shore techniques!
Key Takeaways
- Assess the shoreline for a gradual slope and natural coves that offer protection from wind and waves.
- Position the kayak fully in water, parallel to shore, and facing away from rocks for optimal stability.
- Use your paddle across the back of the cockpit as an outrigger during entry for enhanced balance.
- Time your launch with incoming surges and rising tides to ensure smooth entry and clean paddle strokes.
- Wear appropriate footwear with grip and ensure your Type III PFD is properly secured before launching.
Essential Safety Equipment Before You Start
When you’re getting ready to launch from a rocky shore, having the right safety equipment isn’t just a good idea – it’s absolutely essential!
Let’s start with PFD selection. We’ll need a Coast Guard Approved Type III that fits comfortably and allows freedom of movement. Make sure it’s compatible with your spray skirt and other gear.
Critical Safety Gear Checklist:
- VHF radio (attached to your PFD)
- Paddle float and rescue stirrups
- Waterproof flares or strobe lights
- Helmet designed for kayaking
- Water shoes with good grip
Don’t forget your signaling equipment! A working VHF radio, rescue horn, and waterproof phone in a floating dry bag could make all the difference in an emergency. Choosing a life jacket with a buoyancy rating of 15.5 to 22.5 pounds ensures optimal safety on the water.
Remember: We’re not trying to weigh ourselves down – we’re preparing for success! The right gear gives us confidence to handle whatever the rocky shore throws our way.
Recommended Products

United States Coast Guard Type III Approval

SUPERIOR COMFORT - Features a neoprene collar that prevents chafing, ensuring all-day comfort during various water activities, enhancing your overall experience on the water.

Constructed with 400-denier Ripstop Nylon to handle unexpected snags and debris
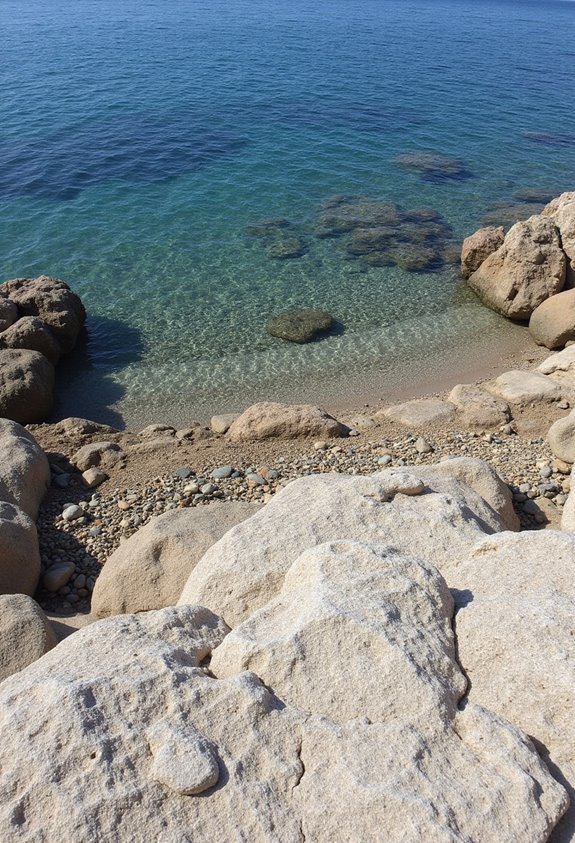
Finding the Perfect Launch Location
Now that we’re properly geared up, let’s focus on finding that sweet spot to launch our kayak!
A thorough shoreline assessment is essential for a smooth launch. We’ll want to look for:
- Areas with minimal large rocks to protect our hull
- Natural coves that shield us from wind and waves
- Gradually sloping entry points (no scary drop-offs!)
Launch conditions can make or break our adventure. Always position the kayak facing into the wind – trust us, you don’t want to get pushed back onto those rocks! Look for spots where the water’s deep enough to float but shallow enough to stand.
Remember those little protected inlets where waves seem calmer? That’s our target! And here’s a pro tip: time your launch with the incoming surges – they’ll help carry you past those tricky rocky sections. Selecting a paddle with proper sizing can also enhance your overall launch efficiency and performance.
Recommended Products

The Old Town Sportsman PDL 106 pedal kayak features a stable, quiet pontoon-style hull and easy-to-use forward/reverse pedal drive for comfortable, hands-free fishing and navigation--and it's light enough to car top.

FOLDABLE DESIGN FOR EASY STORAGE: The 8.0 Foldable Kayak packs down to fit in a car trunk or closet, perfect for apartment living, small vehicles, and tight storage spaces. Sets up quickly for stress-free launches.

UNIQUE CATAMARAN KAYAK DESIGN with built-in transom allows this boat to be paddled by one or two persons standing or sitting or motored with up to 6 hp motor at 17 mph. Also provides a great platform for standing, casting and fishing. Ideal for camping, fishing, exploring lakes, rivers, bays.
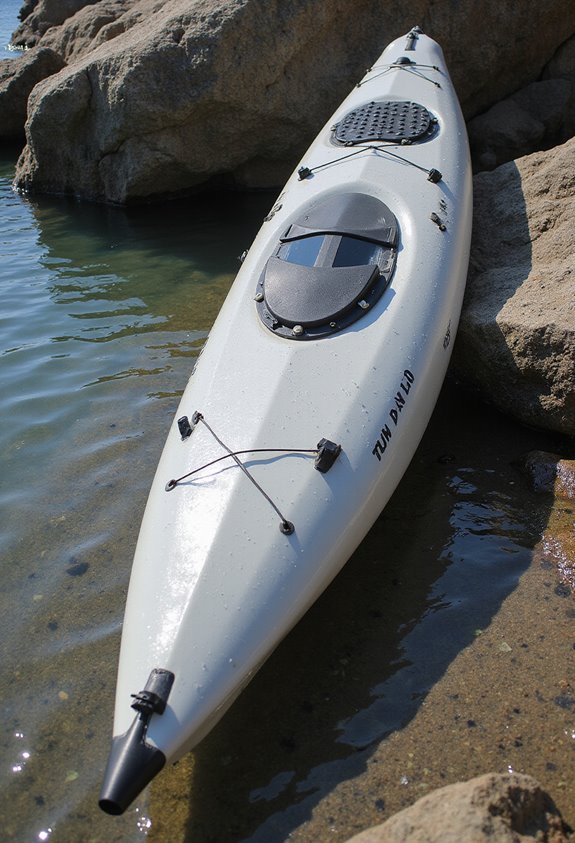
Positioning Your Kayak for Success
Three key factors make or break your kayak positioning on rocky shores – orientation, stability, and timing!
Let’s master the perfect setup. First, place your kayak fully in the water, pointing it away from those pesky rocks. We’ll want to face into the wind for maximum kayak stability while positioning our craft parallel to shore.
Ready to board? Place your paddle across the back of the cockpit – it’s your best friend for balance! Sit on the back deck first, then smoothly slide into position.
Watch those environmental cues! Time your launch with rising tides and wave patterns. Who wants to fight against Mother Nature, right? Position yourself far enough from rocks to make clean paddle strokes, but close enough to maintain control. Remember, stability is essential for avoiding capsizing and ensuring a smooth paddling experience.
Remember: A well-positioned kayak is your ticket to a smooth, rock-free adventure!
Recommended Products

THE PERFECT KAYAK FOR OUTDOOR FUN: The Brooklyn Kayak Company BKC RA220 Angler has everything an angler needs for the ultimate aquatic adventure except for a reel, bait, and a bit of luck.

Design Provides Great Stability and Tracking | Multiple Footrest Positions for Different-Size Paddlers | Constructed of UV-Protected High-Density Polyethylene

Quality Construction: Constructed of uv-protected high-density polyethylene. Multiple footrest positions for different size riders. Stable flat bottom
Step-by-Step Entry Technique

Since mastering the entry technique can make or break your rocky shore launch, let’s break down this essential process step-by-step!
First, position your kayak parallel to the shoreline, letting it partially float to protect the hull. Kayak stability starts with smart preparation!
Now for the important part – paddle control. Place your paddle behind the cockpit, with one blade resting on the rocks. Grip the shaft with both hands behind your back, creating a sturdy outrigger system.
Ready to hop in? Squat beside your kayak and smoothly slide into the seat while keeping weight on your paddle support. (Think of it like easing into a comfy chair – just don’t get too relaxed!)
Additionally, having a well-designed adjustable kayak seat can significantly enhance your comfort and stability during this process.
Finally, bring those legs inside and secure your spray skirt. Congratulations – you’ve just mastered the rocky shore entry!
Recommended Products

Equipped with a saltwater-ready, GPS-enabled Minn Kota trolling motor, the Old Town Sportsman AutoPilot 120 motorized kayak allows you to propel and maneuver using the Bluetooth-connected i-Pilot remote. Motor battery is not included.

Equipped with a saltwater-ready trolling motor, the Old Town Sportsman 106 Powered by Minn Kota motorized kayak offers Minn Kota's low-profile 12-volt motor with 45 pounds of thrust. Motor battery is not included.

Ideal for open water anglers and tournament fishing pros, the Old Town Sportsman BigWater PDL 132 pedal kayak's easy-to-use forward/reverse pedal drive provides easy, hands-free navigation and fishing; pedal drive is removable for easy transport.
Managing Rough Water Conditions
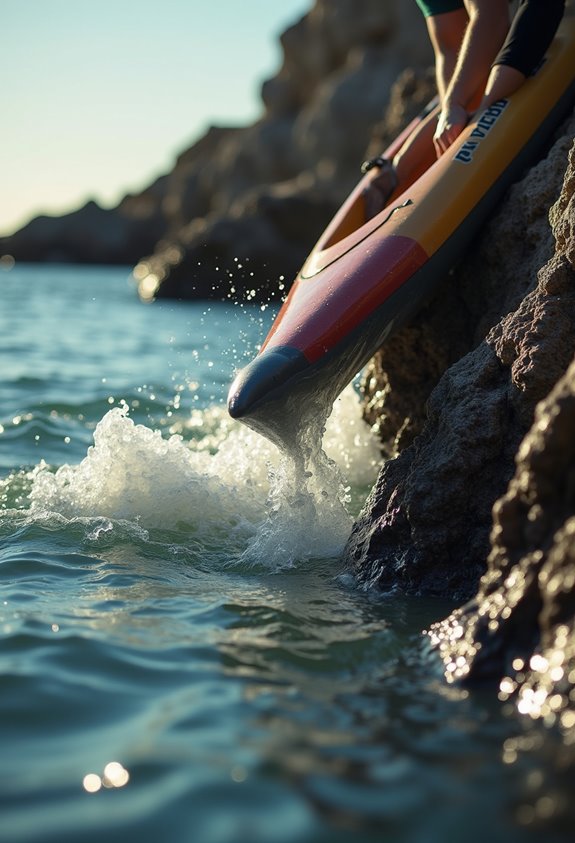
While mastering entry techniques sets a strong foundation, launching in rough water brings a whole new set of challenges! Let’s focus on maintaining water stability in challenging conditions.
First, we’ll want to study those wave patterns carefully. Watch the waves’ direction and frequency to identify those calm “pocket” moments between sets – that’s our launch window!
Position the bow into the wind and waves to reduce rocking, and keep the boat partially on shore until we’re ready to fully commit. Here’s a pro tip: enter from the lee side (the sheltered side) whenever possible.
Remember to use paddle bracing techniques to steady yourself when boarding. A wide stance and deliberate movements are your best friends here!
Need extra stability? Don’t hesitate to use a temporary anchor or dock line to hold position while getting situated. Additionally, consider a kayak with adjustable high seats for improved stability during the launch process.
Recommended Products
Equipped with a saltwater-ready trolling motor, the Old Town Sportsman 106 Powered by Minn Kota motorized kayak offers Minn Kota's low-profile 12-volt motor with 45 pounds of thrust. Motor battery is not included.

【Convenient Modular Design】The foldable fishing boat features a modular structure for easy storage and transportation. It is simple to use and can be quickly assembled in a short amount of time without any additional tools.

OPEN COCKPIT FOR MORE SPACE: For a 12' boat, FastCats offer an incredible amount of usable space. They EASILY hold 2 (FASTCAT12) to 4 adults (FASTCAT14) and several hundreds of pounds of fishing or camping gear.
Common Mistakes to Avoid
Even experienced paddlers can fall prey to common launching mistakes that turn an exciting kayaking adventure into a frustrating ordeal!
Among the most common entry errors, we often see paddlers positioning their kayaks parallel to rocky shores – a recipe for disaster! Let’s face it, who hasn’t been tempted to rush the launch process when excited to hit the water?
To maintain proper kayak balance, always:
- Position your kayak perpendicular to the shoreline
- Use your paddle as an outrigger during entry
- Take your time getting settled in the cockpit
Don’t fall into the trap of skipping your pre-launch safety checks or ignoring weather conditions. And please, leave those flip-flops at home! Proper footwear with good grip is essential when maneuvering slippery rocks. Additionally, ensure that your kayak is equipped with a retractable design to enhance your maneuverability and control during the launch.
Key Tips for Solo Launches
Launching a kayak solo requires a whole different set of skills than paddling with a buddy!
When it comes to solo launch tips, positioning is everything. Let’s start by fully immersing our kayak in water – we don’t want any rock scratches on that beautiful hull! Face your kayak into the wind or waves for maximum stability.
Here are our top rocky shore techniques:
- Sit on the back deck first, then smoothly swing those legs in
- Keep your center of gravity low (no fancy acrobatics!)
- Use your paddle as a stabilizer when needed
- Have mesh bags ready for quick gear transfer
Remember to wear protective footwear – those rocks can be sneaky! And always check water depth before committing to your launch spot. A compact kayak with modular designs can also make your solo launch process easier and more efficient. Want a pro tip? Practice your launches in calm conditions first – you’ll thank us later!
Emergency Procedures and Protocols
Since we’re dealing with rocky shores and rough conditions, let’s talk about the essential emergency protocols you’ll need to know!
Safety starts before launch – always perform emergency drills and verify everyone has properly fitted lifejackets. Keep those PFDs snug!
If trouble strikes, remember these crucial steps:
- Immediately deploy anchor if drifting toward rocks
- Use safety signaling to alert nearby vessels
- Activate bilge pumps for flooding
- Shout “Man Overboard” if someone falls in
For mechanical failures, check fuel systems and engine switches first. If the engine won’t restart, use sea anchors or drag devices to slow your drift.
Remember – don’t jump in after someone! Instead, throw flotation devices and call for help. Stay calm, use your VHF radio for distress calls, and follow established rescue protocols. Better safe than sorry when rocks are involved! Additionally, ensure that everyone is wearing properly fitted lifejackets, as this is crucial for compliance with safety standards.
Frequently Asked Questions
How Long Should I Wait Between Waves Before Attempting to Launch?
We’ll want to wait at least 30-45 seconds between wave sets for ideal launch timing. During this lull, we’ll use proper launch techniques to safely maneuver our boat into the water.
What’s the Best Footwear Material for Gripping Wet, Slippery Rocks?
Like octopi clinging to coral, we’ve found neoprene boots with Vibram soles grip best on slick rocks. We’ll recommend against rubber sandals since they lack ankle support and proper traction for safe launches.
Should I Remove My Kayak’s Rudder When Launching From Rocky Shores?
Yes, we recommend removing your rudder when launching from rocky shores. While we’ll lose rudder advantages temporarily, it’s worth protecting the hardware. Let’s practice safe launching techniques by reinstalling once we’re in deeper water.
How Can I Protect My Kayak’s Hull From Barnacles During Launch?
Let’s protect our kayak’s hull by applying silicone-based sealants and regular waxing. We’ll need consistent kayak maintenance, including routine inspections and prompt barnacle removal, to prevent buildup before and after launching.
At What Tide Level Is It Safest to Launch From Rocks?
Smoothly and safely, we’ll beach launch when tide patterns peak at high tide or during rising water levels. It’s best to aim for 0.5 to 1.0 feet above chart datum for ideal clearance of rocky hazards.


