As an Amazon Associate, we earn from qualifying purchases. Some links on this site are affiliate links at no extra cost to you. Our recommendations are based on thorough research and editorial judgment.

How To Transport Your Kayak Safely On Your Car?
To safely transport your kayak, we’ll need the right equipment and attention to detail! Start by inspecting your kayak for damage and rinsing off debris. Mount sturdy J-style or cradle racks on your vehicle’s roof rails, then work with a partner to lift the kayak upside-down onto the racks. Secure it with heavy-duty straps through the towers and cockpit handles, plus bow and stern lines for extra safety. A quick shake test ascertains everything’s snug – but there’s much more to mastering kayak transport.
Key Takeaways
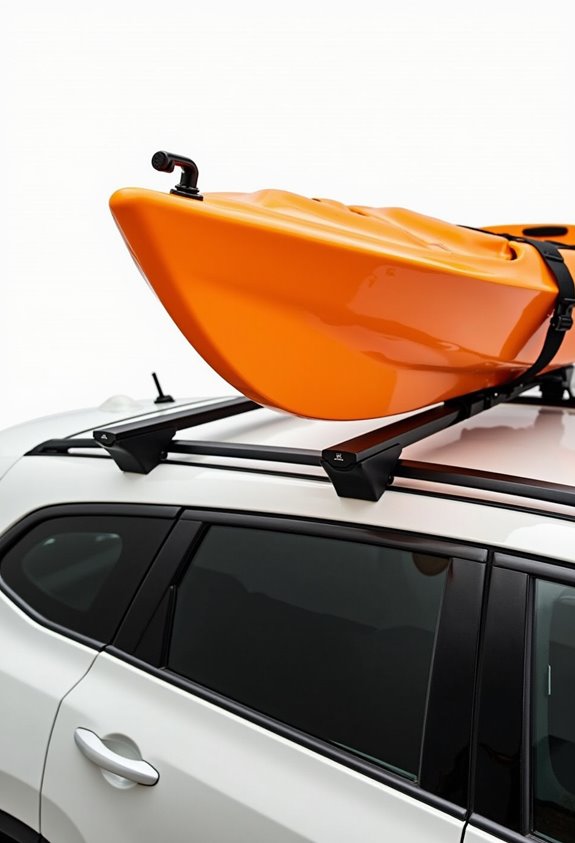
- Use appropriate kayak racks (J-style or cradle) mounted securely to your vehicle’s roof rails or crossbars.
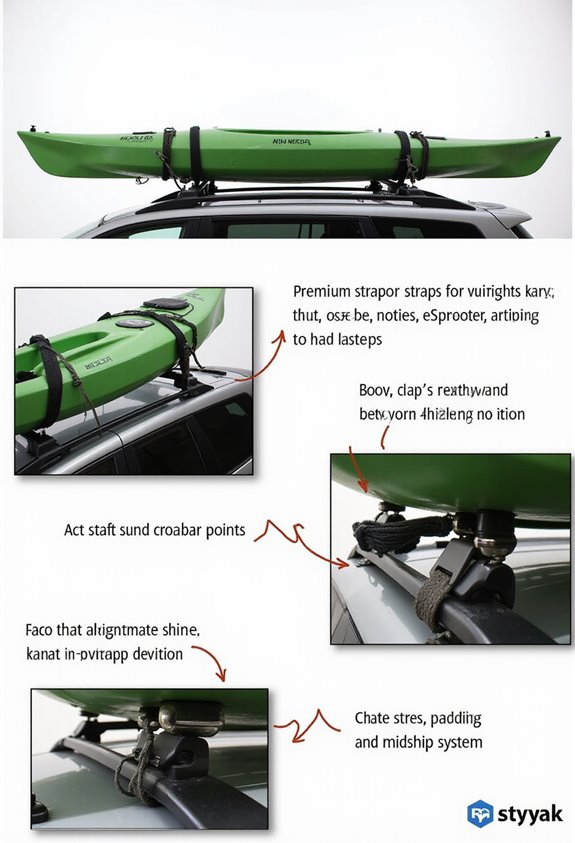
- Secure the kayak with heavy-duty cam buckle straps over the hull and through rack towers for stability.
- Attach bow and stern lines as additional safety measures to prevent the kayak from lifting during transport.
- Check all straps and connections before departure and periodically during longer trips, especially in wet conditions.
- Position the kayak upside down on the rack and ensure it doesn’t block vehicle lights or indicators.
Essential Pre-Transport Preparation Steps
Before hitting the road with your kayak, proper preparation is absolutely essential! Let’s go through the key inspection checklists and cleaning techniques you’ll need for a safe journey.
First, we’ll want to thoroughly examine our kayak for any cracks, leaks, or structural issues. Found a minor problem? No worries – just patch it up with marine-grade sealant before loading.
Next comes the cleaning phase. We’ll rinse away all debris, sand, and especially that pesky saltwater residue using fresh water and soft cloths. Think of it as giving your kayak a spa treatment!
Finally, let’s declutter and secure. We’ll remove all loose items like seats, paddles, and safety gear – storing them safely in our vehicle. Double-check that remaining straps and cords are snug and properly fastened. Be sure to consider proper kayak backrest support to enhance comfort during your paddling adventures. Ready to roll!
Choosing the Right Vehicle and Equipment
While selecting the right vehicle and equipment might seem overwhelming, we’ll break it down into manageable decisions that’ll make your kayak transport a breeze!
Let’s start with vehicle specifications. SUVs, crossovers, and pickup trucks are ideal choices, offering either robust roof rails or spacious cargo beds. Models like the Subaru Outback and Nissan Rogue really shine here!
When it comes to equipment types, you’ll want to focus on these essentials:
- Sturdy kayak racks (J-style or cradle)
- Heavy-duty tie-down straps with cam buckles
- Protective padding materials
- Hood anchors for extra security
Additionally, ensure the load capacity of your kayak cart matches the weight of your kayak to guarantee safe transport.
Step-by-Step Guide to Securing Your Kayak
Three key phases will transform you from a nervous kayak-hauler into a confident transport pro!
First, let’s tackle proper loading techniques. Store those kayak accessories inside your car, flip your kayak upside down, and grab a buddy – one at the bow, one at the stern. Working together makes all the difference!
Next, we’ll secure those straps. Run them over your kayak and through the rack towers, making sure to thread through the cockpit handles. Don’t over-tighten – we want secure, not squished. Give it the shake test to double-check!
Finally, attach those essential bow and stern lines. Think of them as your safety net! They’ll keep your kayak from taking an unexpected road trip if something goes wrong with the main straps. Remember, snug but not super tight is just right. Additionally, consider using adjustable features on your kayak cart to ensure a snug fit and improved stability during transportation.
Weather and Road Safety Considerations
Since your kayak acts like a giant sail on your car’s roof, mastering weather and road safety is essential for worry-free transport!
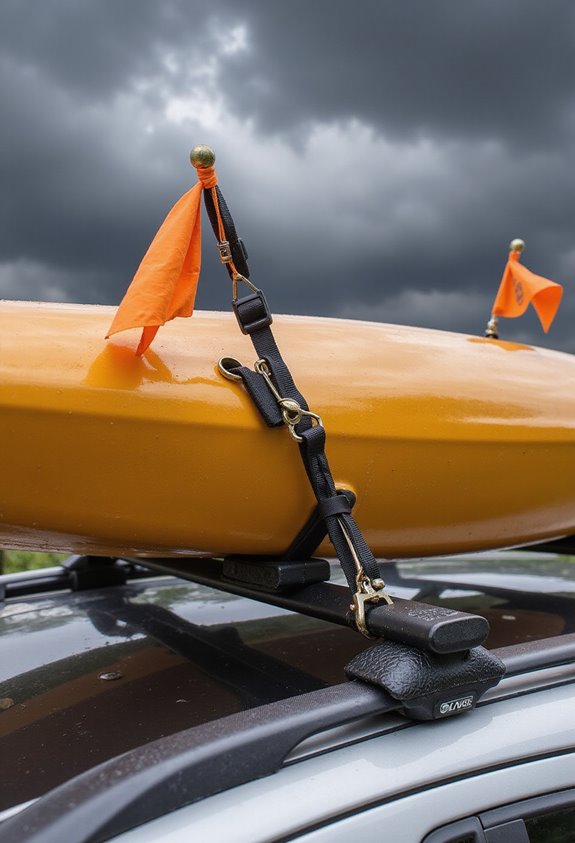
Let’s tackle adverse weather first. Never transport during high winds or storms – your kayak isn’t meant to fly! Check those straps periodically during rainy trips, and always clear off any snow or ice before hitting the road. Additionally, ensure your kayak is secured with U.S. Coast Guard approved life jackets for any emergency situations.
Road conditions deserve our full attention. Watch for low bridges, rough patches, and gravel roads that might loosen your setup. And remember – wet or icy roads mean we’ll need extra stopping distance.
Keep everything legal and visible! Your kayak shouldn’t block any lights or indicators, and those dangling straps are a no-no. Planning a night transport? Add some reflective tape to stay safe and compliant.
Regular safety checks are your best friend. Pull over every few hours to inspect those straps – better safe than sorry!
Common Transport Mistakes and How to Avoid Them

Even experienced paddlers can make critical mistakes when transporting their kayaks!
Let’s look at the most common transport hazards and essential safety tips to keep you and your kayak secure on the road:
- Never rush the loading process – taking time to properly secure your kayak prevents accidents. We recommend loading the night before long trips!
- Double-check those bow and stern tie-downs. Loose or improperly attached lines are a major safety risk.
- Pay attention to your vehicle’s weight limits and rack compatibility. Not all roofs are created equal!
- Test everything before hitting the road. A quick drive around the block can reveal loose straps or concerning noises.
Additionally, ensuring weight capacity requirements are met for your roof rack is crucial to prevent any mishaps during transit.
Remember: that extra 10 minutes spent securing your kayak properly could save you from a disaster on the highway. Safety first, paddlers!
Best Practices for Long-Distance Kayak Transport
Now that we’ve covered common transport mistakes, let’s explore how to properly prepare your kayak for those epic long-distance adventures!
For ideal load distribution, always position your kayak upside down on the roof rack. This protects the hull from warping and utilizes the stronger rails for support. Proper kayak alignment is vital – center it carefully on your rack system!
Don’t rush the setup process. Take time to:
- Double-check all straps and tie-downs
- Run straps through security loops for extra stability
- Use bow and stern lines for highway speeds
- Add padding between contact points
Remember to inspect everything during rest stops. We recommend setting up the night before long trips – nobody wants to discover a loose strap while cruising down the interstate at 70 mph! Additionally, consider using a waterproof dry bag to secure personal belongings against rain and splashes during transport.
Frequently Asked Questions
Can I Transport My Kayak Upside Down on the Roof Rack?
Yes, we recommend transporting kayaks upside down on your roof rack. It’s one of the safest methods, offering advantages like better wind resistance, protection from rain, and enhanced stability when properly secured with straps.
How Often Should I Replace My Kayak Transport Straps?
While we’d love straps to last forever, we recommend replacing them every 3-5 years for transport strap longevity. Don’t wait for failure – regular kayak strap maintenance and replacing them when showing wear guarantees safe travels.
What’s the Maximum Highway Speed When Transporting a Kayak?
We recommend keeping your maximum speed between 65-70 mph for safe driving with a kayak. While some drivers go faster, staying within these limits reduces wind resistance and maintains stability during transport.
Should I Remove the Seats and Footrests Before Transporting?
Like birds preparing their nests, we’ll protect our gear during kayak storage. Yes, we recommend removing seats and footrests. It’ll reduce wind resistance, prevent damage, and guarantee proper seat protection during transit.
How Do I Protect My Kayak From Salt Damage During Beach Trips?
Let’s protect against saltwater exposure by rinsing thoroughly with fresh water after each beach trip. We’ll apply protective coatings like UV protectant and water-displacing lubricants on metal parts to prevent corrosion damage.


