As an Amazon Associate, we earn from qualifying purchases. Some links on this site are affiliate links at no extra cost to you. Our recommendations are based on thorough research and editorial judgment.

How To Pack A Dry Bag For Maximum Space Efficiency?
To maximize your dry bag’s space, let’s start by using compression sacks to squeeze out excess air from soft items. Position heavy gear like stoves in the center, keeping 70% of weight close to your hips for stability. Roll clothing using the army technique, and layer lighter items around heavier ones. Keep frequently used items near the top, and don’t forget to leave 25% space for proper sealing. Our advanced packing strategies will help you become a dry bag pro!
Key Takeaways
- Use compression sacks to squeeze out excess air and maximize space efficiency within the dry bag.
- Roll clothes using the army rolling technique and bundle formal wear to minimize wrinkles and save space.
- Pack heavier items in the center, with softer items at the bottom and frequently used gear near the top.
- Utilize small waterproof pouches inside the main dry bag for better organization and space optimization.
- Leave 25% space at the top of the dry bag for proper rolling and sealing to ensure waterproof closure.
Essential Gear Organization Using Compression Sacks
The secret to perfectly packed dry bags starts with compression sacks – they’re your best friends for maximizing space and keeping gear organized!
Let’s explore the key compression sack benefits that’ll transform your packing game. These handy tools work by squeezing out excess air, allowing you to fit way more gear into your dry bags than you thought possible.
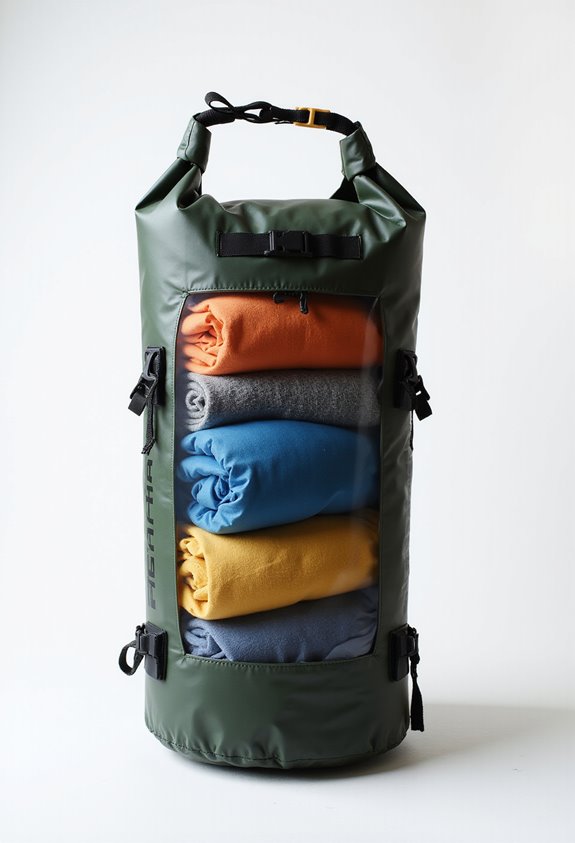
Want to level up your gear protection strategies? Choose compression sacks with transparent panels so you can quickly identify contents without unpacking everything. We always recommend using PFC-free sacks with DWR coating for ideal water resistance. A good choice includes ultra-lightweight bags that ensure lightweight portability during travel.
Pro tip: Group similar soft items together, but don’t overstuff! Place harder items in the center of sacks with reinforced bottoms. When everything’s properly compressed, you’ll be amazed at how efficiently your dry bag fills up.
Strategic Weight Distribution and Layering Methods
Now that your gear’s neatly compressed, let’s master the art of strategic packing!
The key to perfect weight balance starts with your heaviest items. Position stoves, fuel, and dense gear right in the middle of your dry bag, aligned with your body’s center of gravity. This creates a stable core that won’t throw you off balance on the trail.
Keep 70% of the weight low and close to your hips – your shoulders will thank you! Layer lighter items like clothes around these heavy pieces to prevent shifting and maintain load stability.
Quick-Access Strategy:
- Place frequently used items near the top
- Use side pouches for snacks and small gear
- Secure any external items symmetrically
Remember: A well-balanced pack means a happy back! Think of your dry bag like a sandwich – heaviest ingredients in the middle, lighter stuff on top and bottom. Ensuring that you consider waterproof ratings when choosing gear can help you avoid issues on the water.
Smart Storage Solutions for Different Types of Equipment

Since different gear requires different protection levels, mastering smart storage solutions will revolutionize your dry bag’s effectiveness! Let’s break down how to protect each type of equipment strategically.
For electronics protection, we always recommend using dedicated waterproof pouches near the top of your bag. Think phones, GPS devices, and cameras – these need maximum protection from moisture! Consider investing in bags with high-quality PVC for added durability and effectiveness against the elements.
When it comes to food separation, it’s essential to keep consumables away from other gear. We suggest using resealable pouches within a separate dry bag to prevent any unwanted spills or cross-contamination.
Don’t forget about your personal items! Pack toiletries in small waterproof containers, and keep them separate from your food and electronics. Who wants their sunscreen leaking onto their smartphone?
Remember: Smart compartmentalization is the key to dry bag success!
Mastering Space-Saving Folding Techniques
Mastering proper folding techniques can transform your dry bag from a chaotic mess into an organized adventure companion! Let’s explore the most effective methods to maximize your packing space.
The army rolling technique is our go-to favorite for most clothing items. Start by folding sleeves inward, then roll tightly from bottom to top – this method crushes wrinkles while saving precious space!
For formal wear, we recommend the bundle method for wrinkle prevention. Here’s how it works:
- Lay out larger items like jackets flat
- Place smaller garments in the center
- Wrap everything into one neat package
Remember to eliminate air pockets as you roll or fold. We like to press down firmly on each item, ensuring maximum compression. After all, who wants their dry bag looking like it’s smuggling balloons? Additionally, ensure you consider size and capacity to choose the right dry bag for your packing needs.
Recommended Products

BUILT FOR LASTING DURABILITY & STABILITY: Inflatable boats for adults made with heat-welded PVC and a reinforced .9mm 1100-denier rip-resistant fabric layer for heavy-duty use; resists punctures, UV exposure, oil stains, and everyday wear, while the stylish high-pressure drop-stitch air floor helps provide smooth, comfortable, stable rides equal to a RIB for casual boating and fishing

【Wholesale Made Easy】METRONIC supplies bubble mailers 6x10 Inch in full pallet packaging: 16 cases/pallet, 600 packs/case (Total 9600 packs). Bubble mailers 6x9" 9600PC not only eliminates the hassle of frequent restocking but also save on business supplies in bulk.

Slimline & Lightweight: At only 160.9 lb, the Hotham, shedding 8% off its predecessor’s weight, not only improves fuel efficiency but also makes handling easier, redefining what it means to travel light! With its slimline design, it packs down to a mere 5.43 in, 45% slimmer than its predecessor, it’s built for garage or undercover parking, while minimizing wind noise for a smoother drive.
Advanced Tips for Maximizing Dry Bag Capacity
With our folding techniques perfected, let’s supercharge your dry bag’s capacity with pro-level packing strategies!
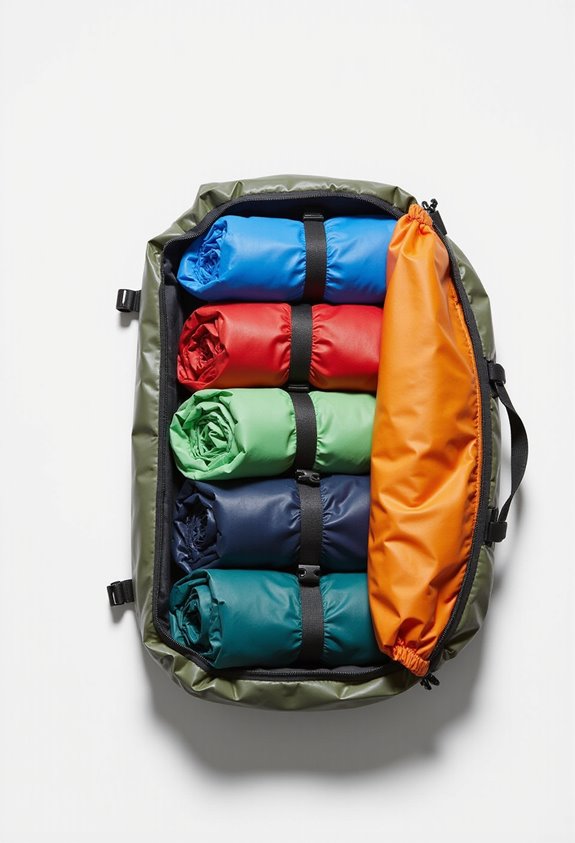
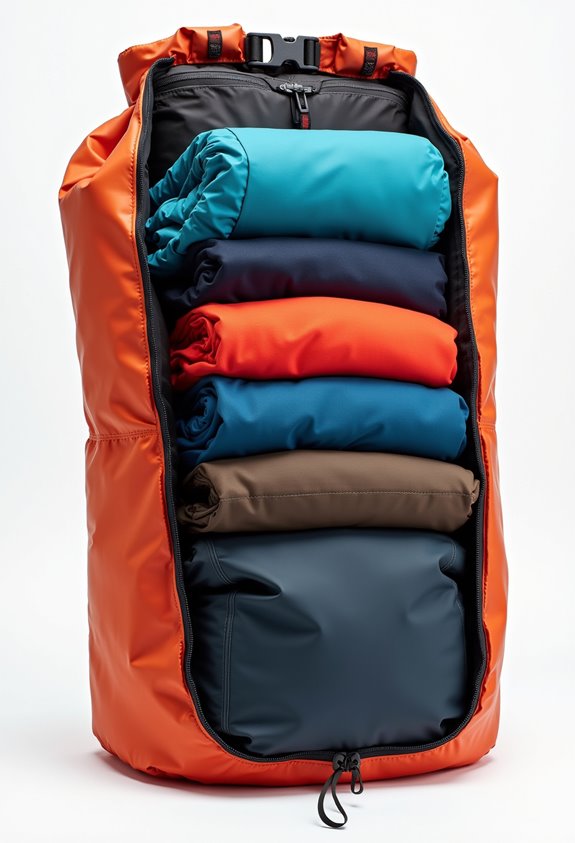
Start with efficient item arrangement by placing softer items at the bottom – think clothing and sleeping bags. They’ll create a protective cushion for everything above! Next, position those hard or sharp items in the center where they can’t puncture your bag’s walls.
Want to master advanced waterproofing techniques? Double up on protection by using smaller dry bags or waterproof pouches inside your main bag. Don’t forget to add silica gel packets to combat sneaky condensation! Remember, using high-thickness materials ensures your dry bag can withstand punctures and tears.
Here’s a pro tip: Leave about 25% space at the top for proper rolling. Remember, a slightly under-packed dry bag seals better than an overstuffed one. Think of it like trying to close an overloaded suitcase – nobody wants that struggle!
Recommended Products
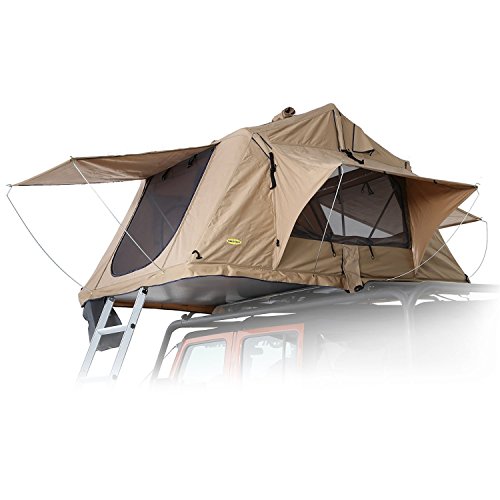
Standard size tent (sleeps 2-3) with high-density 92" x 55" foam double/full mattress and 661 lb. max load

Fitment: For '97-'25 Harley Touring /Softail Models.

Tour Trunk Packs Fit for Indian Chief/ Chieftain/ Dark Horse/ Roadmaster/ Challenger
Frequently Asked Questions
How Often Should I Replace My Dry Bag?
We recommend replacing dry bags based on their lifespan and usage patterns. For heavy use, replace yearly; for occasional use, every 2-3 years. Always replace immediately if you notice tears, leaks, or closure problems.
Can I Wash My Dry Bag in a Washing Machine?
Like playing with fire, we don’t recommend machine washing your dry bag. For proper dry bag maintenance, we suggest handwashing with mild soap and warm water—these laundry tips help preserve waterproof coatings and seam tapes.
What’s the Best Way to Repair Small Holes in Dry Bags?
We recommend using proper sealing techniques by cleaning the area, applying a compatible patch material, and maintaining pressure during curing. For best results, let’s make certain patches overlap holes by 1 inch on all sides.
How Do I Remove Mold and Mildew From My Dry Bag?
We’ve battled a million moldy bags! Let’s tackle yours with natural cleaning solutions like baking soda paste, vinegar spray, or lemon juice. Remember to dry completely after cleaning and store open for mold prevention.
Should I Store My Dry Bag Rolled up or Unrolled?
We recommend storing dry bags unrolled when not in use. While rolling has benefits during trips, long-term storage should be loose to prevent material creases. Let’s hang them open in a dry place.


